
Intro
Unlock radiant glow with Anastasia Beverly Hills highlighter. Discover 7 expert tips to enhance your natural features, from choosing the perfect shade to mastering subtle application techniques. Get the inside scoop on contouring, strobing, and illuminating with ABHs iconic highlighters, and elevate your makeup game with these must-know tricks.
The world of highlighters has exploded in recent years, with new products and techniques emerging left and right. As a makeup enthusiast, you're likely no stranger to the allure of a good highlighter - and one brand that consistently delivers is Anastasia Beverly Hills. With their range of coveted highlighters, ABH has become a go-to destination for those seeking to add a touch of radiance to their complexion. In this article, we'll delve into the world of Anastasia Beverly Hills highlighters, sharing 7 must-know tips to help you get the most out of your product.

Tip #1: Choose the Right Shade
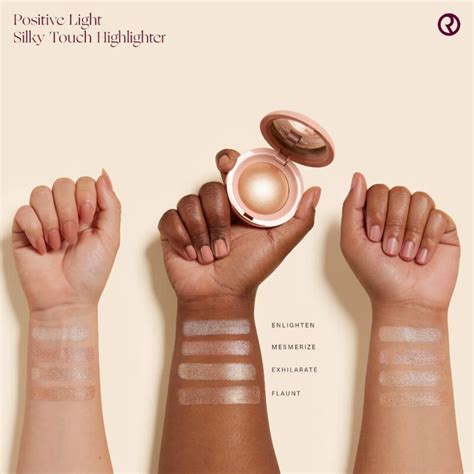
With a range of shades to choose from, selecting the perfect Anastasia Beverly Hills highlighter can seem daunting. To ensure you pick the right shade for your skin tone, consider the following:
- Fair skin: Opt for shades with a pink or peach undertone, such as "Marshmallow" or "Peaches and Cream".
- Medium skin: Look for shades with a neutral or golden undertone, such as "Sunbeam" or "Golden Hour".
- Dark skin: Choose shades with a deep, rich undertone, such as "Mocha" or "Bronze".
Remember, the key is to enhance your natural glow, not to create an unnatural-looking highlight.
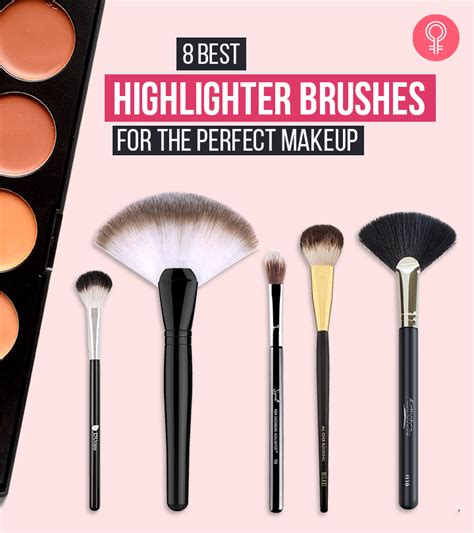
Tip #2: Apply with the Right Tools
The tools you use to apply your highlighter can make all the difference in achieving a seamless, natural-looking finish. Here are a few options to consider:
- A small concealer brush for precise application
- A fluffy powder brush for a more subtle, all-over glow
- A highlighting sponge for a soft, blended finish

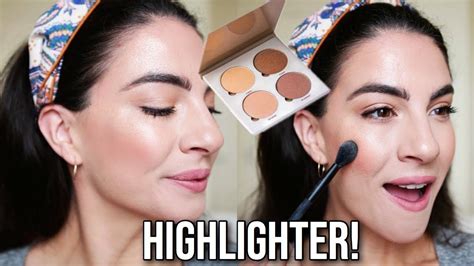
Tip #3: Know Your Highlighting Points
To create a natural-looking highlight, it's essential to apply your Anastasia Beverly Hills highlighter to the right areas of your face. Here are the key highlighting points to focus on:
- The high points of your cheekbones
- The brow bone
- The cupid's bow
- The inner corners of your eyes
Remember to blend, blend, blend! You want your highlight to look like it's coming from within, not sitting on top of your skin.
Tip #4: Don't Forget to Blend
Blending is key when it comes to creating a seamless, natural-looking highlight. To avoid any harsh lines or obvious transitions, make sure to blend your Anastasia Beverly Hills highlighter well. Here are a few blending techniques to try:
- Use a light touch and build up your highlight gradually
- Blend your highlighter upwards and outwards towards the hairline and jawline
- Use a fluffy powder brush to soften and blend your highlight
Tip #5: Mix and Match for a Custom Look
One of the best things about Anastasia Beverly Hills highlighters is their versatility. To create a custom look that's all your own, try mixing and matching different shades and products. Here are a few ideas to get you started:
- Mix a liquid highlighter with a powder highlighter for a unique, multi-dimensional finish
- Layer a cream highlighter under a powder highlighter for added depth and dimension
- Use a highlighting palette to create a custom highlight shade
Remember, the key to mixing and matching is to experiment and have fun! Don't be afraid to try new combinations and see what works best for you.
Tip #6: Set Your Highlight for Long-Lasting Wear
To ensure your Anastasia Beverly Hills highlighter lasts all day, it's essential to set it in place. Here are a few tips for setting your highlight:
- Use a setting spray to set your highlighter and extend its wear
- Apply a light dusting of translucent powder over your highlight to set it in place
- Use a setting cream or gel to add extra longevity to your highlight

Tip #7: Don't Overdo It
Finally, remember that less is often more when it comes to highlighting. To avoid looking like you're wearing too much product, start with a light hand and build up your highlight gradually. Here are a few tips for avoiding over-highlighting:
- Use a light touch and build up your highlight gradually
- Focus on one or two areas of your face, rather than applying highlighter all over
- Blend, blend, blend! This will help you achieve a natural-looking finish and avoid any harsh lines or obvious transitions.
By following these 7 must-know tips, you'll be well on your way to mastering the art of highlighting with Anastasia Beverly Hills. Remember to choose the right shade, apply with the right tools, know your highlighting points, blend, blend, blend, mix and match for a custom look, set your highlight for long-lasting wear, and don't overdo it. With a little practice and patience, you'll be glowing like a pro in no time!
Anastasia Beverly Hills Highlighter Image Gallery
What is the best way to apply Anastasia Beverly Hills highlighter?
+The best way to apply Anastasia Beverly Hills highlighter is with a small concealer brush or a fluffy powder brush. This will allow you to target specific areas of your face and achieve a natural-looking finish.
How do I choose the right shade of Anastasia Beverly Hills highlighter for my skin tone?
+To choose the right shade of Anastasia Beverly Hills highlighter for your skin tone, consider the following: fair skin - pink or peach undertones, medium skin - neutral or golden undertones, dark skin - deep, rich undertones.
Can I use Anastasia Beverly Hills highlighter on its own or do I need to mix it with other products?
+You can use Anastasia Beverly Hills highlighter on its own or mix it with other products to create a custom look. Try mixing a liquid highlighter with a powder highlighter for a unique, multi-dimensional finish.