
Intro
Unlock the full potential of your Wet N Wild palette with these 5 essential contouring hacks. Master the art of definition and dimension with expert tips on shade selection, blending, and technique. From subtle enhancement to dramatic transformation, discover how to contour like a pro using your Wet N Wild eyeshadow palette.
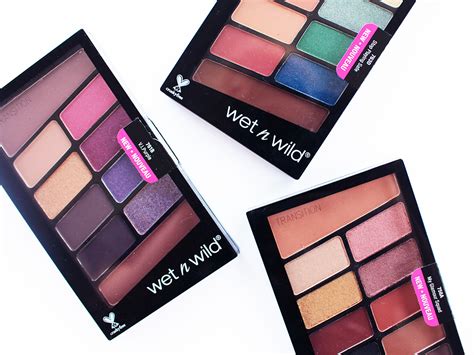
Contouring has become an essential part of many people's beauty routines, and for good reason - it can completely transform the shape of your face and accentuate your features. One of the most popular and affordable contouring products on the market is the Wet N Wild Palette. With its range of shades and affordability, it's no wonder that this palette has become a favorite among beauty enthusiasts. In this article, we'll share 5 essential Wet N Wild Palette contouring hacks to help you get the most out of your product.
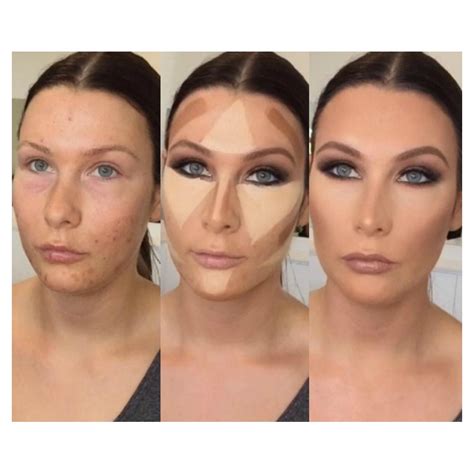
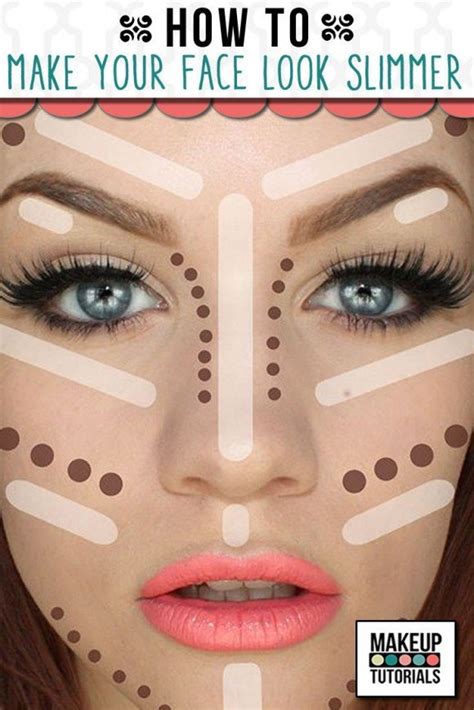
First, let's talk about why contouring is so important. Contouring is a technique used to create the illusion of defined cheekbones, a slimmer nose, and a more defined jawline. It can also help to enhance the shape of your eyes and lips. By using a combination of light and dark shades, you can create a natural-looking definition that will leave your skin looking radiant and healthy.
One of the best things about the Wet N Wild Palette is its affordability. At just a few dollars, it's an accessible option for those who are just starting out with contouring or who are looking for a more affordable alternative to high-end products. But just because it's affordable doesn't mean it's not effective - the Wet N Wild Palette contains a range of shades that can be used to create a natural-looking contour.
So, how do you get the most out of your Wet N Wild Palette? Here are 5 essential contouring hacks to help you achieve a flawless, professional-looking finish:
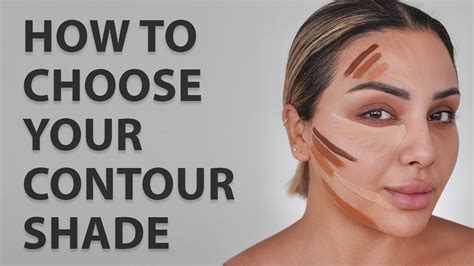
Hack #1: Choose the Right Shade
When it comes to contouring, choosing the right shade is essential. The key is to choose a shade that's one to two shades deeper than your natural skin tone. This will help to create a natural-looking definition that won't look too harsh or unnatural.
If you're fair-skinned, look for a shade that's one shade deeper than your natural skin tone. For medium to dark skin tones, you can opt for a shade that's two shades deeper. Remember, the goal is to create a subtle definition that enhances your features without looking too obvious.
Tip: Test the Shades
Before you start contouring, test the shades on your jawline or cheekbones to see which one looks most natural. This will help you determine which shade to use and where to apply it.
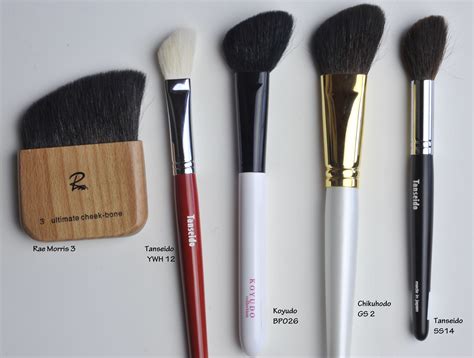
Hack #2: Use the Right Brush
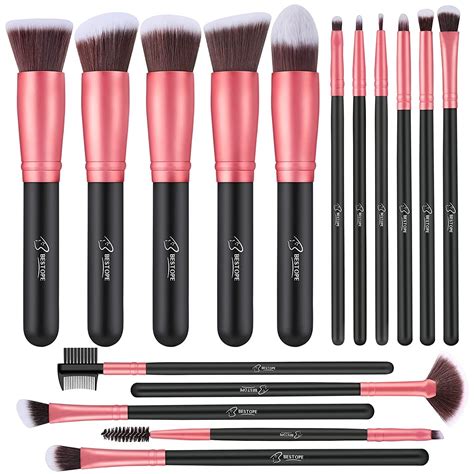
When it comes to contouring, using the right brush is essential. A good contouring brush should be angled and have firm bristles that can be used to create a precise definition.
Look for a brush that's specifically designed for contouring, such as a angled powder brush or a contouring brush. These brushes are designed to help you create a precise definition and can be used to apply the product to the hollows of your cheeks, nose, and jawline.
Tip: Use Light, Gentle Strokes
When applying the product, use light, gentle strokes to build up the color gradually. This will help to create a natural-looking definition that won't look too harsh or unnatural.
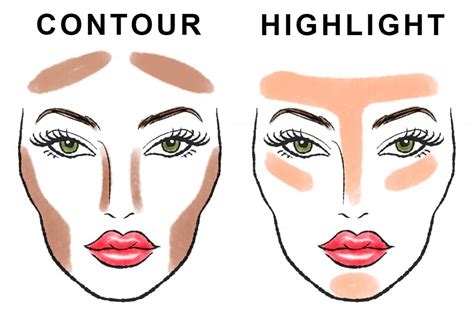
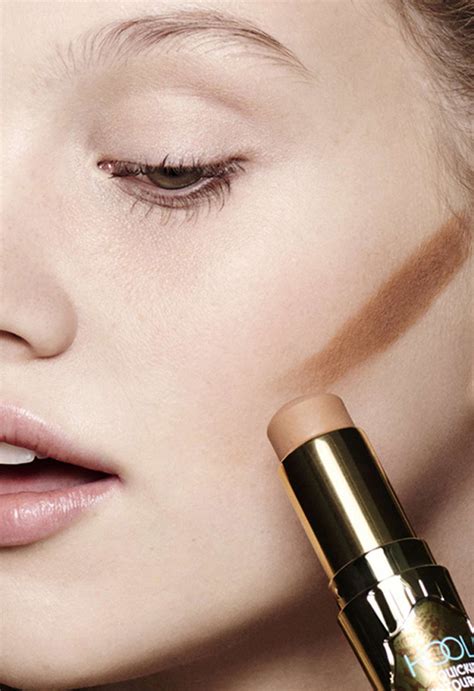
Hack #3: Contour the Right Areas
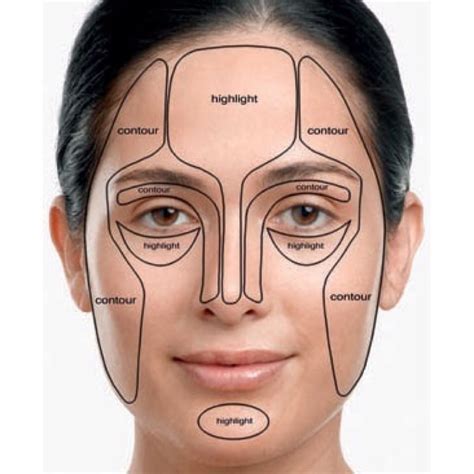
When it comes to contouring, it's essential to contour the right areas of the face. The goal is to create a natural-looking definition that enhances your features, rather than creating a harsh or unnatural line.
Focus on contouring the hollows of your cheeks, nose, and jawline. These areas can be contoured using a combination of light and dark shades to create a natural-looking definition.
Tip: Use a Light Hand
Remember to use a light hand when contouring, especially if you're new to contouring. It's better to build up the color gradually rather than applying too much product at once.
Hack #4: Blend, Blend, Blend
Blending is essential when it comes to contouring. The goal is to create a seamless transition between the contoured area and the rest of your skin.
Use a blending brush or a beauty blender to blend the product into your skin. This will help to create a natural-looking definition that won't look too harsh or unnatural.
Tip: Blend in an Upward Motion
When blending, use an upward motion to blend the product into your skin. This will help to lift the product and create a more natural-looking definition.
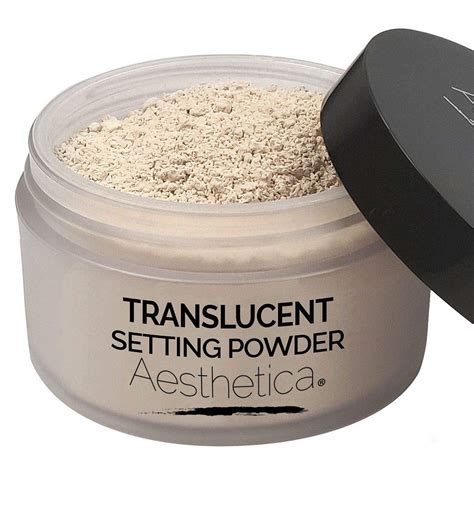
Hack #5: Set the Contour

Once you've contoured and blended, set the contour with a translucent powder. This will help to set the product in place and create a long-lasting definition.
Use a light dusting of translucent powder to set the contour, and then blend the powder into your skin using a blending brush or beauty blender.
Tip: Use a Light Dusting
Remember to use a light dusting of translucent powder to set the contour. Too much powder can create a cakey finish that won't look natural.
Wet N Wild Palette Contouring Image Gallery


What is contouring?
+Contouring is a makeup technique used to create the illusion of defined cheekbones, a slimmer nose, and a more defined jawline.
What is the Wet N Wild Palette?
+The Wet N Wild Palette is a makeup product used for contouring and highlighting the face. It contains a range of shades that can be used to create a natural-looking definition.
How do I choose the right shade for contouring?
+Choose a shade that's one to two shades deeper than your natural skin tone. Test the shades on your jawline or cheekbones to see which one looks most natural.
What is the best way to blend contour?
+Use a blending brush or beauty blender to blend the product into your skin. Blend in an upward motion to lift the product and create a more natural-looking definition.
We hope these 5 essential Wet N Wild Palette contouring hacks have helped you to get the most out of your product and achieve a flawless, professional-looking finish. Remember to choose the right shade, use the right brush, contour the right areas, blend, blend, blend, and set the contour with translucent powder. With practice and patience, you'll be a contouring pro in no time!